How to Use Frenchic Furniture Wax to Get 4 Different Effects
Frenchic furniture waxes can help you transform or seal your wooden and painted furniture. Whether you want to protect or get creative with your project, our versatile waxes are up to the job.
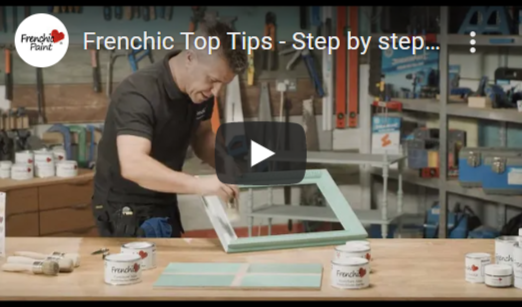
Want to find out more? Watch our video or read on to find out how you can achieve your desired look, with helpful tips and tricks from our Brand Ambassador, Craig Phillips.
About the product
Frenchic Furniture Wax is an easy to use and soft enough to be applied with a brush, yet durable enough to protect your furniture from potential knocks and scrapes. It is also certified child safe (EN 71-3).
Our Furniture Wax comes in four different colours depending on the effect you want to achieve. Our Clear Wax is perfect for your basic seal - it enriches and deepens the colour of traditional style chalk paints like the Original Artisan range and also for bare wood, while our Defining Wax adds depth to furniture by highlighting and defining any carved detailing, panelling or texture.
Frenchic White Wax tones down colours and is perfect for a bleached, or lime washed appearance, or for creating a French country feel. Our popular Browning Wax can be used to age and darken wooden and painted furniture. If the latter is what you're going for, learn how to distress your furniture to create an authentic aged look on our blog.
Tools
- Frenchic Furniture Wax in your choice of colour
- A piece of wooden furniture you want to seal or transform
- Frenchic Original Chalk Paint or any other of our ranges for that matter (if you want to paint your item beforehand). Here Craig uses Anguilla Original Artisan Range
- A wax brush
- Paper towel or lint free cloth
How to apply Frenchic Furniture Wax
The following application process is the same for each of the four waxes regardless of your desired effect:
Step 1
If you decide to paint your item, it’s best to apply a minimum of two coats and then leave it to dry completely before you move onto your chosen wax. For unpainted wood, ensure the surface is clean and dry - remove any previous varnish or coating completely to ensure even absorption and a uniform finish.
Step 2
Using a specially designed wax brush, apply the wax over the surface like you are painting, making sure that you get the product right into the corners and any detailed areas. Then let it soak in for 30-60 seconds. Don’t worry if the wax looks very light or dark when first applied, as this isn’t the finished look.
Step 3
Gently wipe off the excess wax with some paper towel or a soft lint free cloth. Be careful to leave the majority of the product in between the details and definition of the surface at this stage. Then leave the item to dry for 20-30 minutes.
Step 4
Next, you can move onto buffing. Take some clean paper towel or lint-free cloth and bunch it up to form a pad - you will need the surface of your pad to be smooth for best results. Then, using a circular motion, gently buff the waxed surface until you have achieved your desired effect.
Planning a DIY Project?
For more tips and tricks to inspire your own DIY projects, subscribe to our Youtube channel FrenchicTV.
Whether you want to revamp a dated piece of furniture, seal a freshly painted item or learn how to prep an item before starting out, we have the tools for you. If you found this video helpful, don’t forget to like and subscribe!


