


How to Paint Furniture - A Beginner’s Guide
Furniture plays a significant role in your home’s décor. Over time, it can naturally become worn, suffer damage or simply lose its appeal as you look to update your space.
But there’s no need to splash out on brand new replacements – not when you understand the basics of how to paint furniture. With a handful of simple and easy-to-implement tips, you can quickly and effectively revamp your favourite solid (but worn or dated) pieces to give them a completely new look and add your own personal stamp. The same also applies to preloved family pieces or second-hand furniture from charity shops, resale sites or local freebie groups.
So how do you start and what do you need? Our brand ambassador, Craig Phillips, has the answers. Carry on reading and watch the video to learn tips and tricks about how to paint furniture.
What You’ll Need:
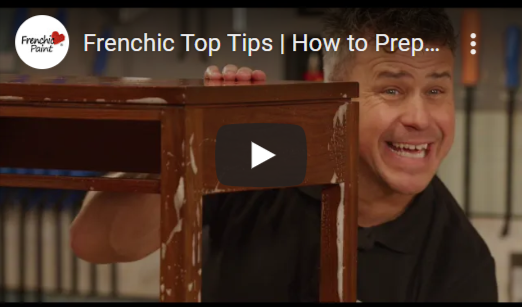
- A ready prepared piece of furniture – see our advice and video on how to prepare your furniture for painting.
- Paintbrush (and a small roller if you choose)
- Useful items like masking tape, a paint tray if using a roller, dust sheets, something to open your tin, and something to stir the paint.
- Your choice of Frenchic paint (more on this later). Craig is using
Hot as Mustard from the self-priming, self-sealing Lazy Range in the video.
Do You Need A Brush And A Roller?
When painting almost any type of furniture, paintbrushes are essential for an efficient and simple job. Choose the right size brush for the size of area you are painting. As demonstrated in the video by Craig, a small roller is also a useful choice for certain areas.
Smaller brushes will take care of the narrow or fiddly bits, such as chair spindles or table legs. Larger brushes or a small roller will rapidly cover the larger areas, such as the tabletop.
Remember that when it comes to painting furniture, the key is to ensure your item is in suitable condition for painting and that you have prepared the surfaces for the paint. Check out our video on this process.
How To Paint Furniture
Step 1: Ready, Steady, Paint!
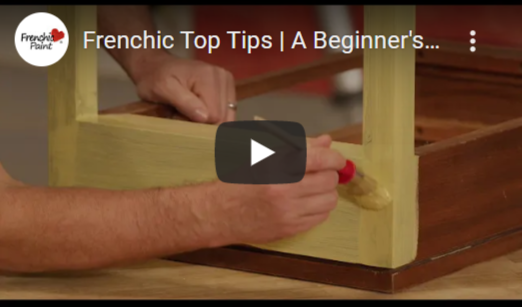
Once your piece is prepped and ready to paint, make yourself some space to carry out the project. Put down dust sheets or similar to protect the surfaces your piece is standing on. Get together all your brushes, rollers and tray if using. Mask off edges, remove any drawers and mask as shown by Craig in the video.
If possible, it is often best to turn over your piece of furniture so you can start painting the bottom and lower parts first. It really makes these bits easy to see and reach. Plus it saves you from a lot of potential bending! If you can raise it up on a table then even better.
Step 2: Go with the Grain
To get started, dip your brush into the paint, just around 1-2 centimetres, and tap off any excess as shown in the video. Try not to overload your brush as this can lead to problems with uneven surface texture, especially on edges. Light pressure and long even strokes will help you achieve a smooth finish.
A great tip is to paint with your brush strokes following the grain of the wood (which tends to run along the width of surfaces or up and down/along legs or ledges). This will make for a natural looking finish. Craig gives great demo in the video of how to deal with areas where panels meet, and the grain is at different angles.
Don’t worry if your first coat does not completely cover, and a little of the surface colour remains visible. This can be sorted with the next coat. If you try to continue working the paint as is starts to dry, it can lead to an uneven textured finish. Let the paint dry for 1-2 hours, depending on the conditions and instruction on the tin.
Step 3: Apply A Second Coat
Your second coat should be applied in the same way as the first, following the (now covered!) grain and with the same brush techniques. The colour will deepen, and you will start to get an idea of how the finished item is going to look.
Sometimes, more than two coats are required, especially if the original piece of furniture is dark or orangey toned and you are painting with a white or cream.
Leave subsequent coats to dry and then you can carefully turn over your piece, so it is the right way up and get going with painting the top in the same way.
Step 4: Top It Off
Most often, the top of a piece is wider and flatter than the rest. This means it can be helpful to use a small roller which can speed things up, especially if you only have smaller brushes.
Use a paint tray to coat the roller, ensuring your roller is nice and evenly loaded. Craig’s tip is to start painting in the middle of the top and to work outwards. Keep it light because exerting firm pressure can cause rollers to skid, particularly on the first coat, leading to an uneven texture. Watch out for any excess paint sitting on the edges – you can smooth this with a paintbrush if necessary. Finish off with long, even strokes in the direction of the grain.
Which Paint Should I Use?
When it comes to colour, it’s completely up to you which shade (or shades) you want to paint your furniture. But in terms of the paint itself, Frenchic offers a selection of high-quality chalk paints for you to choose from.
Our award-winning Lazy Range, used by Craig, is simple to use with self-priming, self-levelling and self-sealing properties. The unique wax infusion gives a soft, low sheen that fits in anywhere. That’s matched in the Al Fresco Range, which has the added benefit of weather-resistance, so it can be used both inside and out.
If you want to get even more creative, try our Original Artisan Range, which is a traditional non-sealing chalk paint. This means you can play around with different effects and use our sealants, topcoats and waxes to seal or add to your decorative finish.
Frenchic – Providing Inspiration for DIY Projects
Wondering how to paint furniture can be a worry but with a few hints and some sounds advice, it really isn’t as tricky as it sounds! At Frenchic, we aim to make things simple and clear so you can avoid any mishaps. As well as plenty of inspiration and top tips on the Frenchic blog, you can find more helpful how-to videos on our YouTube channel.
