


How to Prepare & Paint Decking
With the weather warming up, it's time to give your outside decking area some much-needed TLC. Luckily, the task isn't as mammoth as you might think. All you need is high-quality paint from the Al Fresco Range, cleaning equipment and a little elbow grease!
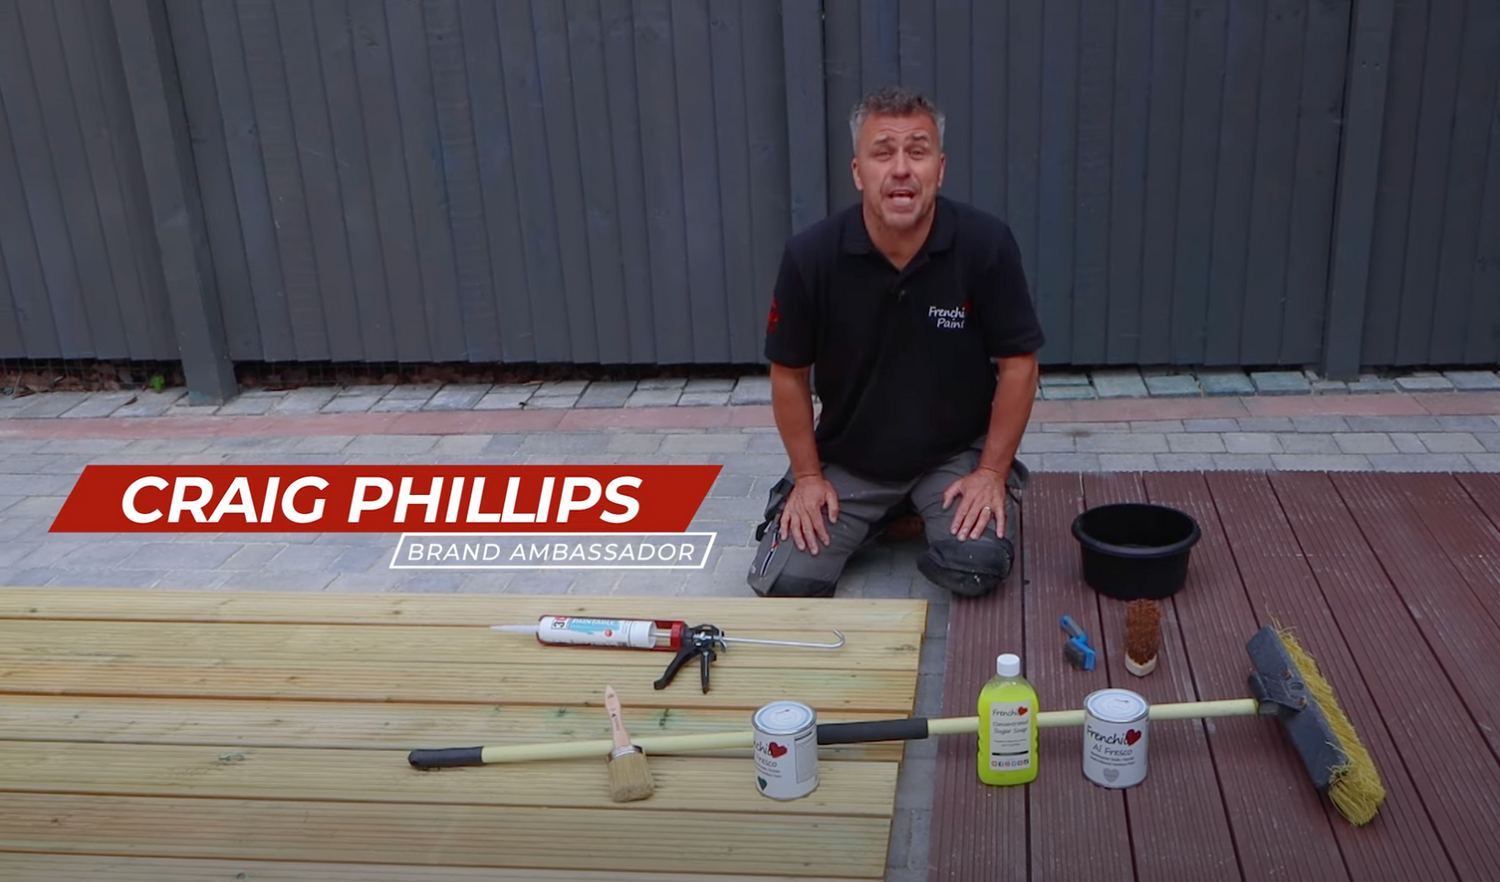
In this video, our talented brand ambassador Craig Phillips explains how to prepare and paint two types of garden decking with lasting results – previously painted deck boards and brand-new timber decking straight from the manufacturer.
Although the material is the same, they require slightly different approaches to achieve a dreamy, super-smooth coverage.
How to paint decking
What You’ll Need
- Decking paint from the Al Fresco Inside/Outside Range (Craig uses Victory Lane and Swanky Pants)
- Sugar Soap
- Large Oval Brush or optional handheld paint sprayer
- Optional finishing coat
- External, flexible and paintable wood filler
- Scraping tools and a damp cloth
- Sanding sponge and light sandpaper (Craig uses P150 grit)
- Hard yard brush
- Hand scrubbing brush
- Small wire wool brush
- Cleaning products, including sponges and buckets
- Optional pressure washer (jet wash)
How to prepare previously painted wood planks before the first coat
As Craig says in the video – if you fail to prepare, prepare to fail! Thorough preparation is the secret to any successful DIY project because wooden decking surfaces must be in a suitable and dry condition for paint to adhere.
Firstly, it's important to note that old decking will need to be structurally sound and free from any rot and decay. While decking paint can refresh the appearance of exterior wood, it can't fix structural issues. Inspect your decking for its condition and be sure to fix any loose boards into place before you start painting.
As for preparation, start by scrubbing your previously painted deck boards with a stiff brush to remove debris. Then give the timber a good clean with a hand scrubbing brush and sugar soap solution. Mix the sugar soap with warm water beforehand for an effective decking cleaner that removes dirt, debris and grease. A smaller, hard-bristled brush effortlessly slips between the grooves, making it easier to eliminate stubborn moss and algae.
A powerful jet wash is the quickest way to remove the soapy residue. However, a few buckets of warm, clean water works equally well. Whichever you choose, ensure the planks are completely dry from the centre to the furthest corner before you move on to sanding and begin painting. Remember, external wood surfaces can retain moisture for up to 48 hours after preparation.
Craig waits until the following day for the next steps. He uses a compact wire wool brush to flake away loose old paint chips and splinters. Then he smooths the wood with light sandpaper and brushes away the dust, leaving smooth boards that are ready to go.
Preparing brand-new wood planks before you begin painting
Brand-new deck boards are often tanalised with a water-based wood treatment to preserve the timber. However, the process sometimes gives the decking an unusual green tint. Don't worry – it's not a bad thing. Al Fresco paint is thick and creamy enough to cover any imperfections, giving you a consistent colour with a matt finish.
Another thing you might notice are countersunk screw holes that have gone deeper than the grooves themselves. Craig suggests filling small cracks or holes like these with an external, paintable filler or risk water collecting in the pockets and penetrating the wood. It's easy to apply with a caulk gun. Place the nozzle over the hole, squeeze a small amount in and press it flat with a scraper. Finish by smoothing everything out with a damp cloth or finger.
Although Craig's planks are brand-new, he notices a large crack in one of the grooves. The solution? He takes the same approach – applying filler, scraping away the excess and wiping everything down with a wet cloth. All that's left to do is wait for the filler to dry, which takes around 24 hours.
The final step is to gently buff the surfaces with a sanding sponge and P150 grit sandpaper. Not only will this flatten any lumps and bumps, but it'll remove splinters before painting. Afterwards, give everything a good sweep with a stiff broom.
How to paint previously painted exterior woodwork
Once you've meticulously inspected the woodwork and removed loose flakes and dirt, it's time to get painting. Craig uses Swanky Pants (below) – a sophisticated and sassy shade of grey, ideal for contemporary spaces. Best of all, you can apply it directly onto timber surfaces because it's self-levelling, self-priming and self-sealing.

There's no need to dilute the mixture when painting previously painted planks unless you opt for a handheld sprayer (see the FAQs above). Craig applies the colour straight from the tin, giving it a firm shake beforehand.
As for technique, there isn't one really! The process is so simple that the most inexperienced DIYers could achieve a flawless finish. Simply brush up and down on the planks following the grain, paying special attention to the treads. Craig uses a Large Oval Brush with long bristles to firmly press into the recesses. A roller isn't typically suitable because of the grooves on deck boards.
Although Al Fresco paint is touch dry in one hour, Craig recommends leaving the first coat for four hours in normal conditions before applying another one. He also suggests removing your shoes while painting – socks are far less likely to damage your hard work. Adopt the same method for the second coat. You don't need to dilute the mixture or sand between layers.
How to paint brand-new exterior wood planks
Painting brand-new wood planks is a little different. Craig uses Victory Lane (below) to set the scene – a popular shade of British racing green that makes colourful flowerbeds and freshly mown lawns pop. As he's painting onto bare timber, he dilutes his mixture by 10% with clean, cold water. Give everything a good stir to help the colour penetrate the wood.

A Large Oval Brush is the best choice for unique projects like decking areas because it offers maximum speed of coverage. Plus, it's suitable for almost any type of paint. Like above, there's not much technique involved – just follow the grain and work your bristles into the grooves and edges. Leave the first coat to dry for at least four hours.
Unlike previously painted planks, you might need to gently sand bare timber between coats. If you do this, brush away excess dust before moving on to your second layer. After another four hours, Craig suggests adding a third coat because the paint has been diluted. Basically, the more you apply, the better protection you'll have!
What’s the best paint for outside decking?
Now you know how to paint decking, you’re probably searching for high-quality materials. If you want to revamp your outside area, you can't go wrong with specialist paint from the Al Fresco Range. It requires very little preparation and can be directly applied onto wood planks, so you'll be ready to relax in the sun or entertain guests in no time!
While Craig used Victory Lane and Swanky Pants, there are countless other colours to browse – plus exciting Limited Editions offered annually. You can also check out the Frenchic blog or YouTube channel for more decorating tips and tricks.
Decking paint FAQs
When is the best time to paint garden decking?
External wood surfaces can retain moisture for up to 48 hours after rainfall or preparation. As such, it's best to check the weather forecast and wait for a stretch of dry weather before painting your decking or outside timber furniture. Summer is the perfect time to brandish your brushes and get to work!
How much paint do you need for decking?
Craig estimates that a 750ml tin of paint would cover around 12 and a half square metres of decking. However, this varies depending on how porous and flat the surface is. Most planks have routed-out grooves for non-slip treads, so you might need more mixture to fill the gaps. We suggest checking the details on the side of the tin for information about coverage.
How long does it take to paint decking?
In the video, Craig only paints a small area of decking – around six square metres, which takes him approximately 12 to 15 minutes with a Large Oval Brush. Hopefully, this gives you a rough estimate of times.
However, if your area is a lot larger or you're working to a tight deadline, you could use a handheld paint sprayer instead. When choosing this method, dilute the mixture by 15%. Otherwise, it'll be too thick to pass through the nozzle. Craig also suggests applying three coats to achieve full coverage.
How do I protect my decking so it lasts?
You'll be pleased to know Al Fresco paint is highly durable and completely weatherproof, so perfect for outdoor projects. Plus, it's self-priming and self-sealing for maximum convenience. Nevertheless, you could add a finishing coat for extra protection if your decking is going to receive heavy traffic. Something like Frenchic's Tuff Top Coat will do the trick.
Can I use decking treatments like oil / stain?
The choice between decking paint, decking oil and decking stain is mostly cosmetic. If you choose the right products, all three will protect your exterior wood from the elements and provide better anti-slip qualities for your outdoor space.
Decking oil is the preferred choice if you want to enhance the natural beauty of the wood grain rather than cover it. Stains provide more of a varnish effect, but still show the wood grain. Finally, paint is the best choice if you want to add colour rather than having the natural oil or stain finish.
Can I use fence paint for decking?
Outdoor fences require the same water- and UV-resistance as timber decking, so the same paint is often suitable. At Frenchic, we recommend our Al Fresco range for both of these exterior wood projects. However, because it's subject to foot traffic and garden furniture, decking requires extra protection. Two coats of Frenchic's Tuff Top Coat is a good way to add this.

