


Key FAQ Points:
- Stir paint to avoid drips
- Use brushes and rollers that are dry and the right size for the area you’re painting
- Don’t overload your brush and watch out for drips on edges and corners
- Be vigilant as you paint - brush out drips before they start to dry
- After a drip happens, let it fully dry and then sand down it or scrape it away
---
Whether it’s walls or furniture, paint drips can form during just about any painting project. All too often, you only notice them when they’ve dried, making them harder to remove – and adding to your frustration.
The best course of action is to prevent them altogether. A little effort and vigilance will save you time and inconvenience further down the line. Luckily, there are a number of tips and tricks to help you avoid them. In this post, we’ll discuss how to prevent paint drips – and how to fix any that you find.
How to prevent paint drips
First and foremost, it’s important to understand what causes paint drips in the first place. They occur when paint is:
- Too thin or ‘runny’
- Applied too thickly
- Applied unevenly
Here’s how you can avoid those issues…
1. Stir your paint thoroughly
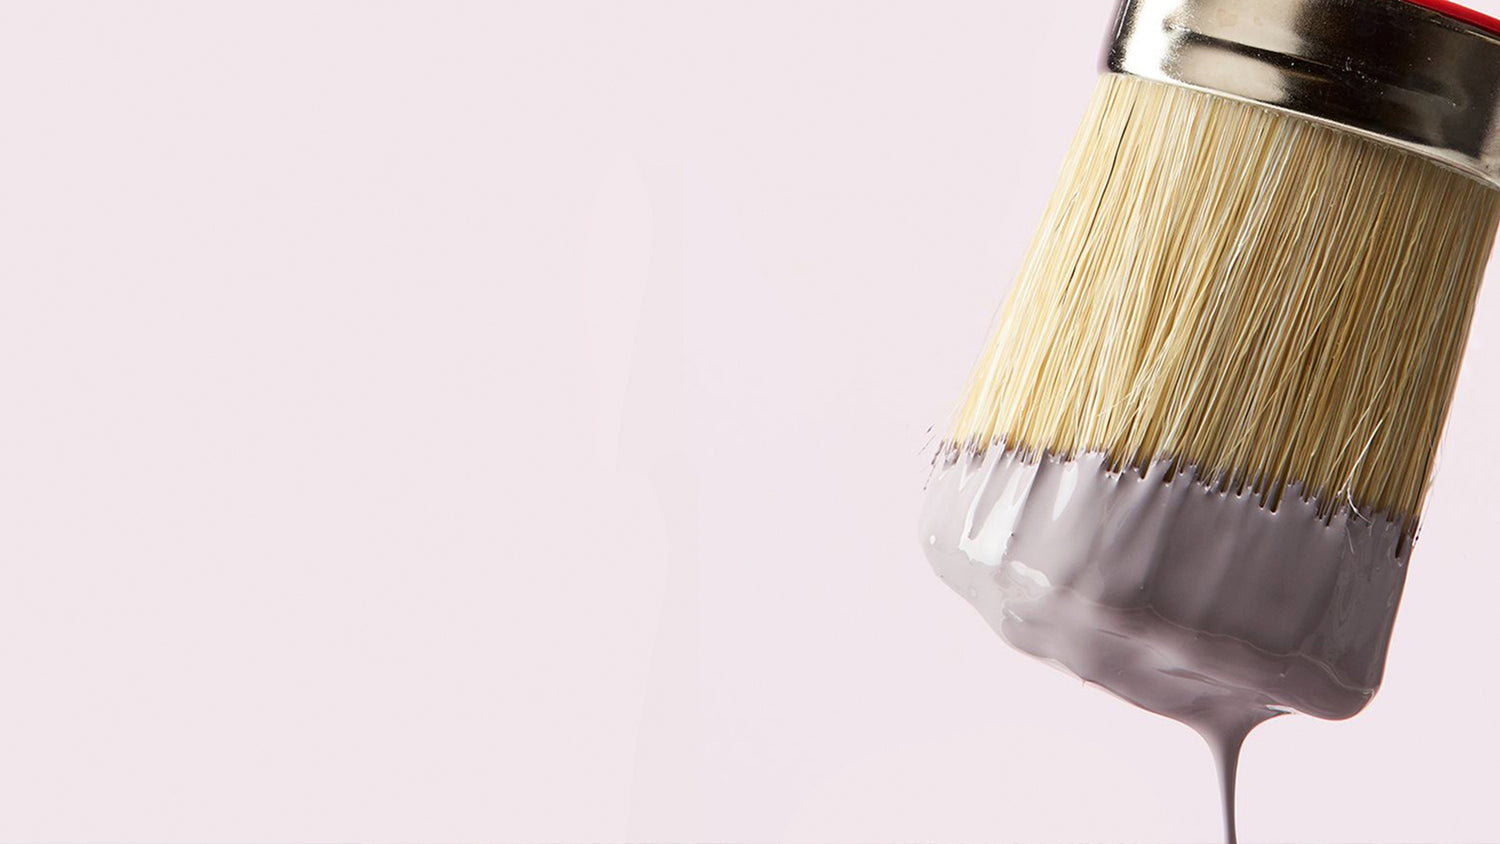
As basic as it sounds, a really good stir will make all the difference – and shaking the tin is not anywhere near as effective. Paint can settle over time, making it thinner at the top of the tin.
Using a wide implement is best to make sure you incorporate all the ingredients, right down to the bottom of the tin. If you don’t want to mess up your best ruler, wooden spoon or other make-shift tool, it’s worth investing in a purpose-made paint stirrer.
2. Use dry brushes and rollers
Rinsed out equipment can retain a surprising amount of moisture. If you use damp tools, the moisture can cause thinned paint, leading to drips. Rollers are particularly notorious for this, so squeeze them out really thoroughly before leaving to dry – and check before reusing. Leave brushes flat or with bristles hanging down while they dry to prevent water being trapped in the metal ferrule.
3. Size matters
Using a brush or roller that is too big can result in excess paint collecting on or around edges and in recesses. That leads to paint drips, especially for things like spindles, beading, panelling and where walls meet woodwork. Always cut in with a suitable sized brush around the edges of areas you will be rolling.
4. Less is more
Another top tip is to avoid overloading your brush or roller with paint and then trying to stretch it out. This tends to lead to uneven coverage which can mean drips form on walls and build up around detailed areas. Use your brush to smooth out paint that builds up on edges and ledges before it can form drips. Start in corners and smooth away from there, keeping pressure light and even with longer strokes.
5. Be vigilant
Try to get into the habit of checking edges and ledges (and around corners) as you go, because it is easiest to smooth out a drip before it has started to dry.
How to fix paint drips
If you spot that paint drips have appeared, despite your best efforts, and you can’t smooth them with a brush because they have dried, all is not lost. You can deal with them successfully with the right approach…
1. Don’t tackle tacky drips
Trying to brush out a drip once the paint surface has started to dry will not work and can make a small problem much bigger by spreading the partially dried paint. Leave it to dry completely – and remember this may take longer than usual as the paint is thicker.
2. Assess the paint drips first
The tools you need will depend on the size and extent of the drip, as well as the sort of paint you have used. More durable paints are harder work for obvious reasons! Whatever approach you use, try to avoid damaging the surrounding paint as this leads to a bigger area to manage overall.
3. Sanding down small drips
If the drip is small, then you may well be able to sand it away. Try a fine to medium sandpaper and see how you get on. Keep the direction of sanding along the length of the drip rather than across it to minimise the effect on the surrounding paint.
4. Use a scraper for larger drips
For larger or more stubborn drips, a clean scraper blade, or similar, should do the trick. Remove as much of the drip as you can and then smooth out any remnants with sandpaper – again following the length of the blemish as above. If the paint is still a little tacky underneath, you may find it easier if you allow more time for it to dry before sanding.
5. Touch in the sanded area
You will need to touch in the area you have sanded. Try to do this in the same way as it was originally painted to minimise the chance of the surface texture appearing different (which will draw attention). Once you’ve removed any sanding dust with a clean, slightly damp cloth, use a brush or roller as appropriate.
6. Use filler for deeper scuffs
If you find that the process of removing dried paint drips has resulted in deep scuffs and scrapes, then you may need to use a filler to level up the surface. Choose a filler that is appropriate to the surface you have painted (or a multipurpose product). Prepare the area by sanding to smooth before applying as per its instructions. Sand again lightly once your filler has dried and paint over as described above.
Some paints work best over filler if a primer is used. Choosing a self-priming paint means you don’t have to worry about adhesion. However, some fillers can be porous and absorb paint which may lead to an uneven finish. If this happens, you may need to sand lightly again before applying a second coat of paint.
Always start with a good quality paint
The tips above will help your prevent paint drips and fix any that slip through the net. Alongside those tricks, it helps to have a top-quality paint as your starting point. At Frenchic, you can choose from a selection of beautiful chalk paints for furniture, walls, outdoor projects and so much more.
All our paint ranges are self-priming to minimise preparation and make it easier to touch up paint after removing drips. That’s topped off with a selection of stunning colours to make sure your project has the perfect look as well as being drip-free.

