


Have yourself a crafty Christmas with Frenchic
This year, we’re choosing a handmade Christmas, one that celebrates the pleasure of crafting. Homemade gifts don’t need to be complicated; some leftover Frenchic paint, a touch of Frenshimmer and a bit of imagination is all that’s needed.
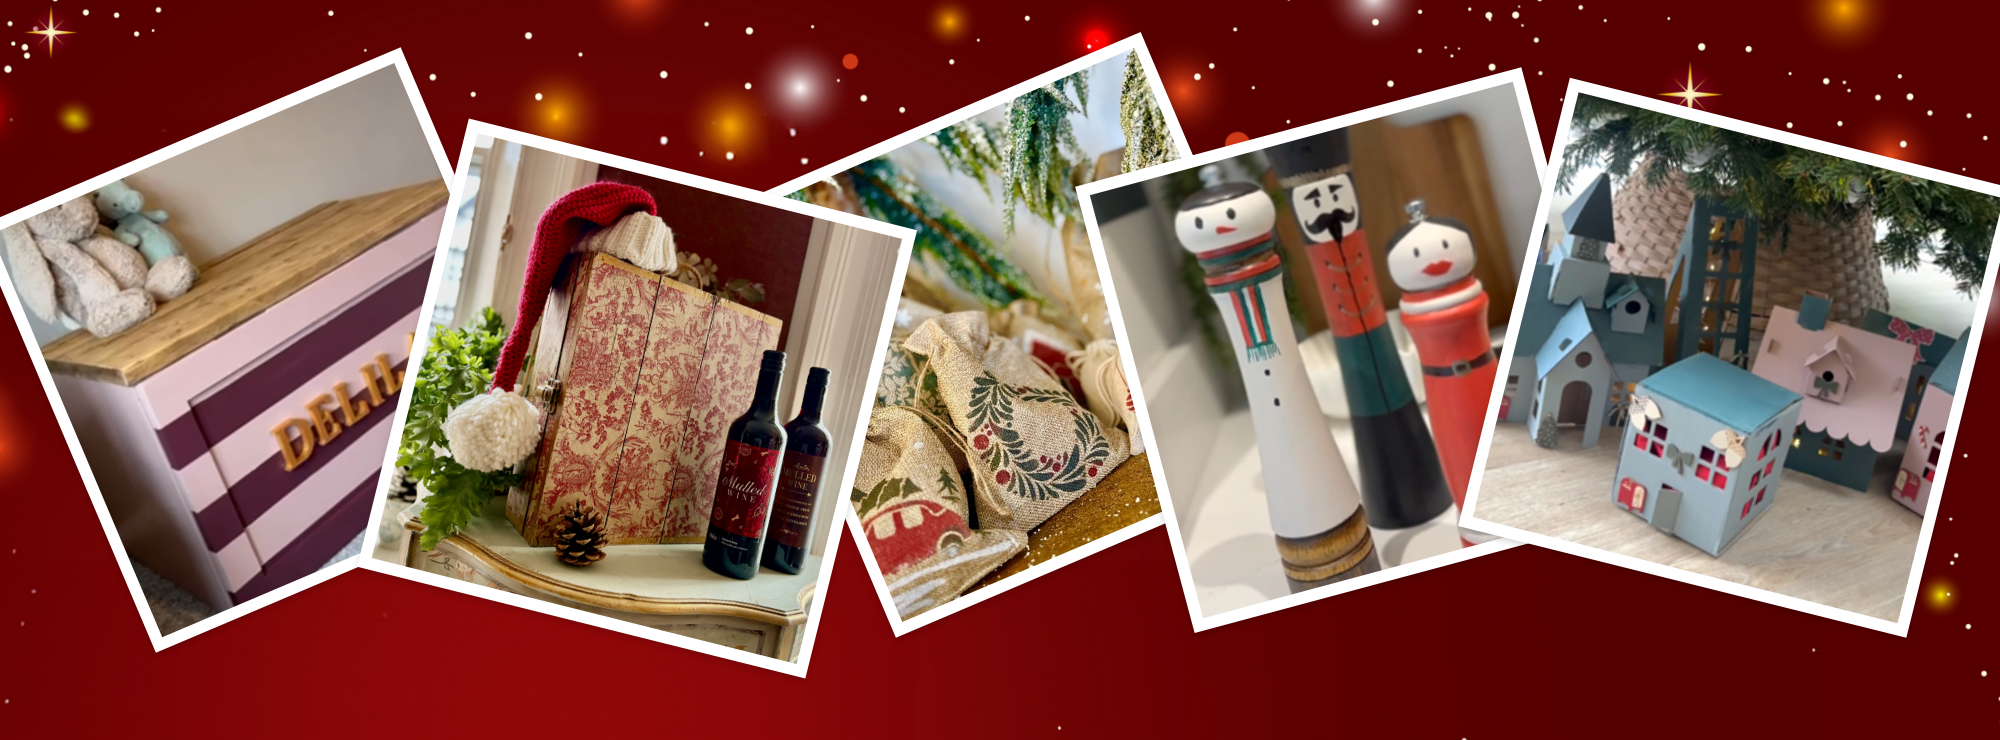
From hand-painted pepper mills to decorative wine boxes to personalised pieces for little ones, and inventive wrapping made from hessian sacks and leftover delivery boxes. These straightforward projects bring creativity and festive spirit without the pressure.
With Frenchic, you can create a Christmas that feels more intentional, more imaginative, and delightfully handmade.
1. Kirsty’s hand-painted pepper mills
Kirsty @houseofhaz incredible hand-painted pepper mills are the perfect idea for gifting or putting on your Christmas table. She gave the pepper mills (which she found at a local charity shop) a light sand with a 120-grit sandpaper and a good clean with Sugar Soap.
For the painting, Kirsty had a combination of Al Fresco, Lazy Range and Trim paint leftover in her cupboard. To get the look for the nutcracker, Mrs Claus, and the snowman she used Cool Beans, Blackjack, Victory Lane, Flamenco and finished them with a touch of Frenshimmer Golden Oldie.

2. Karen’s decoupaged wine box
Creative Artisan Karen had an old unfinished pine box at home which she transformed with decoupage. She began by painting it in Panther in the Original Artisan Range, it only needed one coat (the coverage is amazing). When it was dry, Karen added a coat of Easy Crackle, and left it to dry for a few hours. If you want to speed up the process you can use a hairdryer on a medium or cool setting (make sure it’s not too hot as it will make it tacky).
Karen added a layer of Sugar Puff in the Original Artisan Range and saw the magic of the crackle emerge. She then applied a napkin on top using Finishing Coat (follow Karen’s step-by-step guide to decoupage). Using a dark colour like Panther underneath the crackle means the cracks are dark and show through the napkin giving the illusion that the crackle is on the surface.
When it was dry, Karen added another thin layer of Finishing Coat, and when that was dry, she gently sanded the top to smooth out any wrinkles, before adding one final thin coat of Finishing Coat.
To bring the Christmas sparkle, Karen added detail by masking out an area and applying Gilding Wax, a mix of Browning Wax and Gorgeous Gold Frensheen. The final touch was adding Browning Wax in places over the decoupaged image to give an aged effect.

3. Abi’s personalised toy blocks
Neutrals Expert Abi printed off the name Milo (her new puppy!) to use the letters as a template. She stuck masking tape to greaseproof paper so it would be easy to peel off and cut round the template.
She then grabbed a 4x4cm wood baton from her local hardware store and cut it down into 4cm blocks, so she had four equal square blocks.
Abi sanded them down with 120-grit sandpaper, rounding off the corners and edges and painted them in a base colour of Crème de la Crème. She then stuck the masking tape down and painted over them in the base colour once more to ensure nice crisp lines.
Once the blocks were dry, she painted two in Drama Llama and two in Fennec (Abi loves a neutral but this is where you can choose any colour combination you fancy).
After two coats Abi peeled the masking tape off whilst the paint was still wet, and then to give it the final flourish, she edged the letters in Frenshimmer in the shade Golden Oldie.

4. Kayleigh’s upcycled toy box
DIY Expert Kayleigh found this IKEA toy box for £10 in a charity shop; it just needed a good clean up with Sugar Soap. She used some MDF to make a shaker style front and sanded everything down with a 120-grit sandpaper. For the paint, Kayleigh used Dusky Blush and Boho Berry which complement each other so well. She used Kings Gold for the letters for the name and finished off the toy box with some scaffolding boards on top of the toy box, cut to size and stained in Browning Wax.

5. Kirsty’s recycled gift boxes
Forget the gift wrap this year, this is a better idea! While wondering what to do with all her leftover delivery boxes, Kirsty @houseofhaz had the genius idea of re-using them. She took all the boxes her items were delivered in, cut windows and doors in them, painted them with her favourite @frenchicpaint shades and then popped all the items back in.
Save that tip run with all the left-over cardboard and make these cute holiday houses instead.

6. Karen’s stencilled gift bags
Another brilliant way of avoiding unnecessary landfill and wrapping paper being just chucked away, is to gift in a bag you have embellished yourself. Karen bought some hessian bags and some Christmas stencils and used the Christmassy colours of Riad Red, Black Forest and Wedding Cake.
To avoid the paint bleeding through, cut out a piece of card and pop into the bag. Then lay the bag flat, if the bag is creased, you can give it a quick iron to flatten it out.
Choose your stencil – and using masking tape, fix it into position – Karen suggests positioning further down the back if there is any writing on the stencil as the bag has a drawer string and when filled with your gift, it may distort the writing.
Using your Frenchic Stencil Brush, dip into the paint, dab away any excess until the brush barely has any paint on it and then with an up and down dabbing motion, fill in the areas you want in your chosen colour and you may need to come back to an area after the first few dabs will soak into the fabric.
Top tip: if stencilling close to an area you want to be a different colour, using a bit of masking table to cover that area makes it easier.

Awards & Recognition
