


6 DIY Garden Makeover Ideas on a Budget
Looking for inspiration to help you spruce up your outdoor living space? It doesn’t have to cost the world. Watch our video or read on to discover how you can give your garden an inexpensive upgrade with quick and easy upcycling tips from our Brand Ambassador Craig Phillips.
What you’ll need:
- Frenchic Al Fresco Paint
- A small hand-held paint sprayer or a selection of paintbrushes
- Garden furniture that you want to update – or the raw materials to build something new
- Sandpaper
- Optional – electric screwdriver, polythene masking sheets & browning wax
Why use the Al Fresco range for your outdoor space?
Frenchic Al Fresco paint is perfect for transforming outdoor furniture, as it’s highly durable, weatherproof and UV resistant.
The Al Fresco range is certified child-safe and can be used on a variety of materials from wood to ceramic and metal to UPVC. It’s also suitable for use with a handheld paint sprayer, as is all Frenchic paint, making it easy to paint large items quickly.
And to top all of that off, its self-priming and self-levelling qualities mean it’s easy to get a professional finish without years of experience.
6 quick & easy budget garden ideas to try out
1. Try a low-cost fence transformation
Over time, your fixed garden furniture can begin to look worn as it’s open to the elements all year round. A painted fence in particular is likely to fade due to sun exposure, but giving fence panels a new lick of paint can really help to bring them back to life.
The easiest way to repaint your fence is using a handheld paint sprayer, as you can cover a large area much more quickly than using a paintbrush. Simply adjust the nozzle and spray up and down fence panels in a fluid motion.
It’s a good idea to apply two coats of paint as rough-sawn timber is very porous, so this will fully weatherproof it and help it last longer.
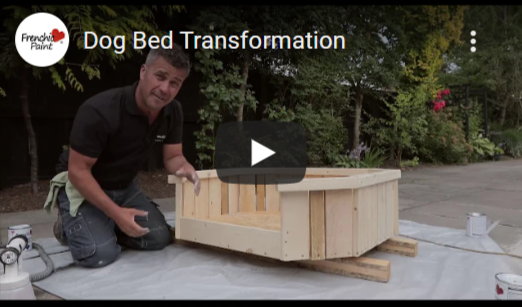
2. Make garden accessories for pets with a dog bed transformation
If you share your home with a four-legged friend, you might also want to create a designated space in your garden for them.
Building a wooden dog bed is relatively simple and can be done on a small budget using off-cuts from old pallets. You can choose whatever shape or size you’d like and then personalise it using our non-toxic Al Fresco paint for a more professional look.
Don’t forget to add in a cushion so your dog can lounge comfortably!
3. Add a focal point with a summer house transformation
Like fences, summer houses and garden sheds are exposed to all kinds of weather and as a result, their appearance will change over time. However, this doesn’t automatically mean you need to replace it. Instead, you can save money by giving your garden shed or summer house a DIY makeover on a budget. Here’s how…
Step 1 – Sand & fill
As your garden furniture ages, the paint will fade and cracks can appear as the wood expands in the summer heat. That’s why it’s important that you fill in any cracks before starting your upcycling project and sand off any old paint to help the new coat adhere better.
Step 2 – Prep the windows
Painting a large item like a garden shed is much easier using a paint sprayer, but you need to be careful around windows and other areas that you don’t want the paint to adhere to.
We recommend using a polythene masking sheet that you can simply stick along the top of the window and roll down into position. You can then apply more masking tape to the edges to secure it in place.
Step 3 – Paint
If you’ve never used a paint sprayer before, don’t worry – it’s easy! Hold the nozzle roughly four inches away from the surface and adjust the nozzle depending on the direction you want to paint.
When it comes to the window frames and any other detailed areas, use a flat or oval brush to get right into the corners.
Again, you want to do two coats of paint to fully weatherproof the item and you should remove the masking tape before it dries to prevent pulling off any fresh paint.
4. Sand and spray for a quick stool transformation
Outdoor seating is one of the most popular forms of garden furniture. Whether you have stools or chairs, you can easily revamp your seating area with a fresh coat of paint.
First, remove or cover any seat pads to protect them from paint splatters. Next, sand down the legs to help the new paint adhere. This is particularly important if the wood was previously varnished.
To paint the stool, we recommend using a hand-held paint sprayer to get into tight spaces and around any moulded details with ease.
5. Create functional wooden furniture by building your own outdoor bar
If you’re ready to take on a bigger project and love having people round to socialise, why not build your own DIY garden bar? It’s not as hard or as expensive as you might think!
Step 1 – Build the frame
First, you’ll need to build the frame. To do this, we recommend using 3 x 2 tanalised timber and then cladding it with some old wooden pallets. The size and shape will depend on the ground space you're working with. However, bespoke wooden furniture is a great way to make the most of even tiny spaces.
The easiest way to do this is to lie the frame flat on the ground and then position each slat onto the frame, leaving a small gap between the panels to allow space for the wood to expand in warmer weather.
When you’re happy with how it looks, screw the slats in place using an electric screwdriver. You can drill holes as a guide for your screws using a small drill bit to make things easier.
If you're using reclaimed wood, bear in mind that it might have a few holes to fill before painting.
Step 2 - Add the paint
As with other large items of garden furniture, we’d recommend using a paint sprayer to paint the frame more quickly and to do two coats to fully weatherproof the wood. Normally, you'd need a good-quality primer first, but Frenchic's Al Fresco range is self-priming, so you don't need to buy additional products or spend more of your time painting!
If you’d like a more unique effect, you could try creating a gradient effect, where the slats start off darker at one end of the bar and gradually get lighter.
To do this, simply mix around 5% of the lighter colour into the darker one as you move along each slat. You’ll need to use a paintbrush for this as it requires a bit more precision and don’t forget to wipe your brush off between each panel.
Step 3 - Top it off
Once you’ve finished the frame, you’ll then need to top your bar off. To keep costs down, we recommend using a sheet of environmentally friendly OSB board and applying a protective layer of our durable furniture wax to seal it.
For the purposes of this tutorial, we used our popular browning wax to darken up the wood, but you can use whatever colour you prefer.
When coating the wood with the wax, apply a heavy layer using a paintbrush and leave it to sink in for 15-20 minutes. After that time, you can firmly buff it out with an old rag to create your final polished look.
6. Give your garden a pop of colour by painting plant pots
If you're looking for cheap garden ideas, potted plants are always up there. But plant pots on their own can look a little humdrum. Not with a lick of paint, of course. Without breaking the bank, you can create unique plant pots for bedding plants, climbing plants or even fresh herbs.
Step 1 - Preparing your plant pots
Start by cleaning your pots. A quick wipe down with a damp cloth is fine for new puts, but you'll need some Sugar Soap for older pots with soil, moss or existing paint on them.
Step 2 - Seal the surface
To avoid moisture causing paint to flake further down the line, you'll want to seal the inside and outside of terracotta pots using Finishing Coat. Two coats should suffice, but you can add a third if you want to be sure.
Step 3 - Add instant colour with weatherproof paint
Next, add your choice of paint colour. The Al Fresco range is water- and UV-resistant to keep your budget-friendly makeover looking the part. It's also self-priming and self-sealing for minimal effort with the best results.
Step 4 - Make life easier with low-maintenance plants
To save money over time, you want a low-maintenance garden. It's worth researching your favourite plants to find which are easiest to keep in your back or front garden. Because they live for more than one season, perennial plants are probably the way to go if you want to breathe new life into your garden year after year. Thankfully, your unique plant pots will continue adding colour and visual interest every year too - alongside your choice of colourful blooms.
Top tip - If you're working with a small space, hanging baskets are a great idea. Choose some trailing plants to incorporate more greenery without taking up ground space. You can even grow vegetables in hanging baskets if you're feeling particularly green-fingered.
Quick DIY fixes for any garden size
As you can see above, you don't need a garden designer or acres of outdoor space to create a garden you love. Our budget garden ideas are easy for DIY beginners who want to freshen up their existing garden or even a new patio area.
Frenchic's Al Fresco range makes it easy to breathe new life into old furniture and fixtures or even recycled materials. Whether you want to freshen up small garden accessories or create a larger focal point for your outdoor area, our weather-resistant, self-priming and self-sealing paint makes it easier.
If you’re new to DIY or you’re trying out something a little different, don't forget to subscribe to our Youtube channel Frenchic TV for helpful tips and tricks from our Brand Ambassador Craig Phillips.
